
Sound familiar? Yes...for me a need/desire to clear out the clutter has been pretty much constant since...well, probably forever. I'm repeatedly astounded by the amount of stuff we've amassed, and constantly overwhelmed by the need for a better organizational system. And though the abundance of things isn't new news around here, surely the issues have multiplied since we added three children to the mix (no, they actually have nothing to do with most of my pack-rat ways, but they sure do have hoards of their own, so I feel entitled to shift at least some of the blame on them,)
We've gone through all kinds of mini-cleanups over the years, Kon-Mari'ing a closet here and there, purging a pantry or clearing out the garage...But the battle I'm currently losing? Toys. OH the toys. They're everything, and everywhere. Under beds, under furniture, underfoot...
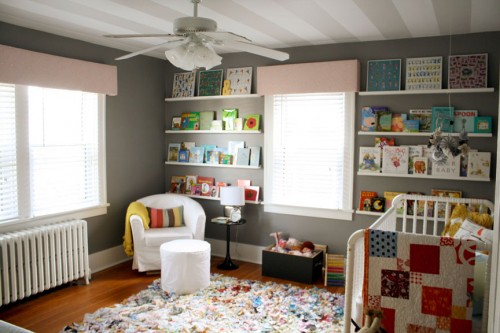
Unfortunately, I didn't take any official "before" shots, but I trust you can imagine what it looks like to have stuff pretty much in shambles. Just in case you need a reference though, here are some throwback pics of some babies that might have grown up way too fast (oh...with some toy nonsense in the background):

(This gratuitous baby shot illustrates except for how dang cute he was...)


We needed a solution.
The good news is, I had an idea. The space between the wall and the cabinets in our playroom was perfect for our two bins of toys, but we were wasting precious vertical real estate. I thought if we could do some sort of hanging storage, we could take advantage of that space, and free up more room below to shuffle the toys around a bit into a system that made a bit more sense, and allowed a bit more wiggle room in the actual room.
I scoured Pinterest, sure that they'd have the answer, but didn't find anything that matched my vision. I wanted a hammock, but not the traditional triangle net type that I kept finding. I needed something a bit more custom to fit the exact spot we were working with. In my head, I imagined a simple system with rods and fabric, to form a sling. I figured some tension rods and a piece of fabric would do the trick, so after a quick pillowcase prototype assured me this idea was just simple enough to work, I whipped up the read deal. And low and behold, it worked...So now I pass on to you my latest organizational pride and craft joy- a DIY toy hammock:

Genius, yes?
Ok..if not genius at least satisfyingly effective, right?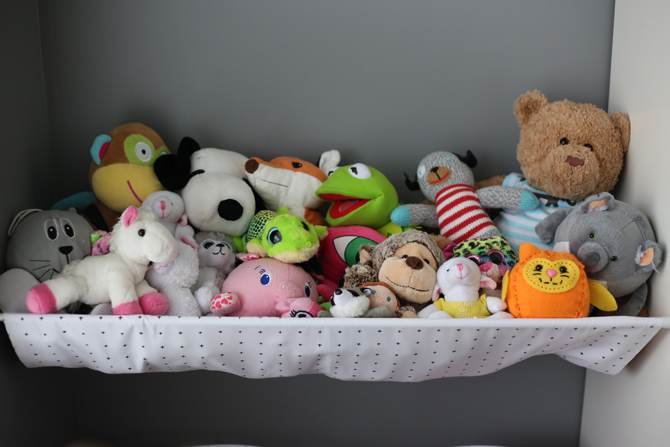
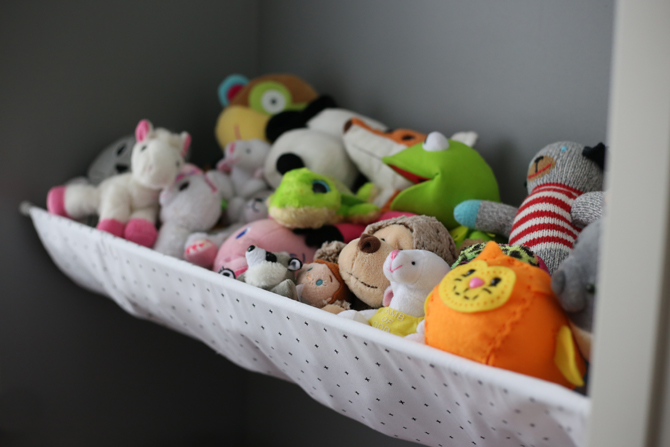
Because we had already cleared out as many stuffed "friends" as possible, this holds the core group of BFF's that our kids just couldn't bear to part with. We still have spots in beds reserved for the very special lovies, but this is a spot for the rest of the menagerie. And with them out of the way (but low enough that the girls can still reach them to play, and maybe even put them away!) we had room in the bins below to devote to dolls and balls (and whatever else these kids choose to amass).

And the best part is that the how-to couldn't be easier.
It just requires two tension rods, and one piece of fabric. The size of your fabric will depend on your space, but from side to side, it should be about 1" longer than the width of your space (to allow for hemming on both sides). The depth will vary too, based on where you're placing it, but with our 15" deep bookshelf, 19" of fabric worked well to allow enough swag to form a "pocket" for the animals without being so deep that little guys got lost. Whatever your "depth" is, double that, so you can make it one continuous loop. (so my piece was 39" total- 19"x 2 with an extra inch for seam allowance).

Once you have your piece cut, fold it in half lengthwise, and sew together to form the loop. Then make a 1/2" hem on each end to finish it off. Slide the tension rods in, and fit them to your space, adjusting the placement as needed. Done!

You do need to make sure the tension rods are tight, so the weight from the toys doesn't cause them to slip (this is part of the reason we chose to store stuffed animals here vs. dolls or something heavier). If you wanted to, you could use regular dowel rods with cup-hook brackets on each end, but I liked that this was a flexible solution. We can keep it as long as it works, and adjust it if needed. We could also add one on the other side of the cabinet (and park strollers underneath), or even do another level above this one (for toys they don't need to access constantly, but still can't live without? For top-tier stuffies?)
I don't know that Shark Tank is going to be breaking down my door wanting to finance my display of ingenuity, but I was pumped that a half hour of work and about eight dollars in supplies (the quilt fabric stash keeps on giving!) lead to something that so dramatically improves the function of this space.


And one project tackled means we're one step closer to total organization domination. Or at least one step further from being buried alive by our own possessions. I call that a win. Now...on to the basement. See you all in 3 years...
P.s. Let me know if you attempt a version of your own. While I still work to get our place in order, I'd love to live vicariously through the clean spaces of others!
--------------------------------
Psssst....Want to get all the Bowdenisms news delivered right to your inbox?
YES PLEASE! Subscribe via email and never miss an -ism. xox.


No comments :
Post a Comment