
But it gets even better...another one of my favorite nursery blogs (yes, I have many!) Chic & Cheap Nursery, is featuring our room too! Check out our post- with lots more details and photos!
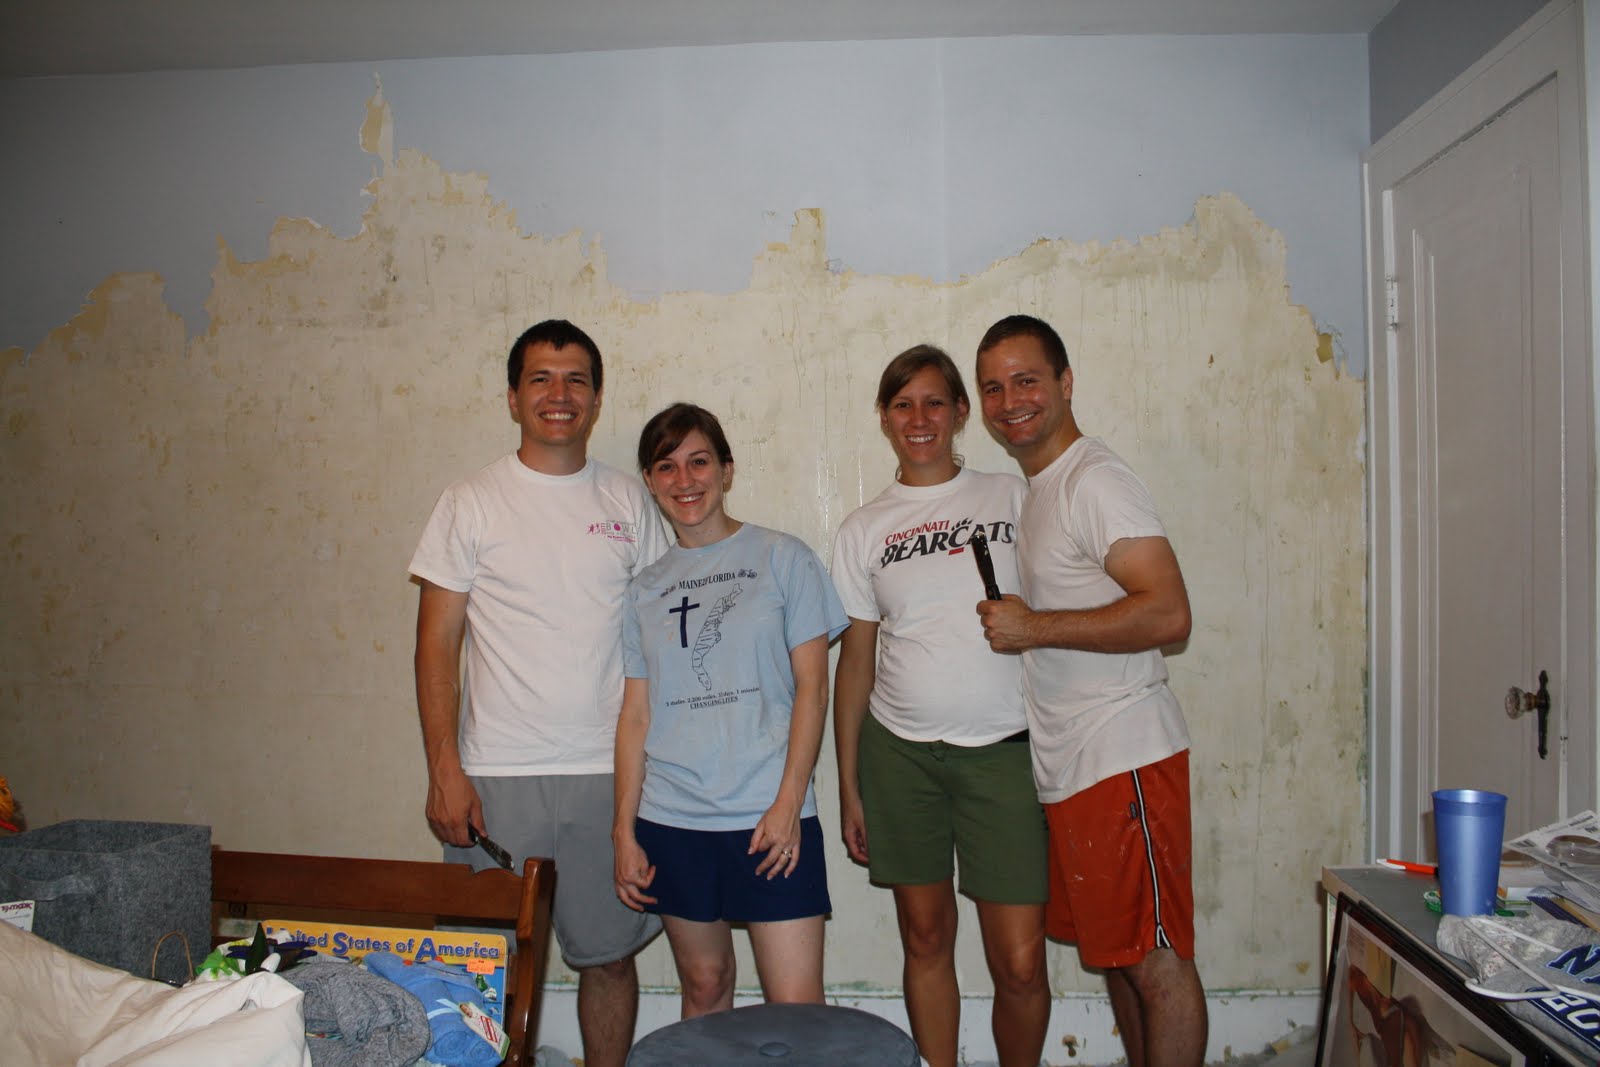
So for anyone still here...even though you've already seen some of the shots, there is (much much) more to the story, and we're excited to show you where our little bug will be spending her time. First: A reminder of what we started with:

A mixture of a blank slate...and a complete mess.
First step was to remove the wallpaper. And OH MAN what a task this was. We didn't realize the room even had wallpaper when we first moved in because the walls were all painted with a seasonal mural. We painted over that with a light grey, but it took about a million coats to fully cover it. Only when we were done did we discover that there were seams on the walls...telling us we had now fully sealed about 8 paint layers over wallpaper. Ugh. This time around we could have painted over it again, but we were worried that it was going to start to bubble, and in the long run, starting with clean walls would be a better choice. And we had already removed wallpaper from the guest bedroom, so how hard could it be, right? Spoiler alert- really freaking hard. The paint had pretty much formed an impenetrable force field over the wallpaper. We spent the better portion of a week steaming, scraping, and silently praying the paper off the walls. Thank goodness we had help.


But eventually we reached that light at the end of the tunnel, and we were ready to paint (well...prime...and then paint...)


I knew I wanted grey walls, and after much hemming and hawing (my signature move when it comes to selecting paint) I chose Mickey's Shadow. Yes, it hurts my design pride a little to say I picked a Disney paint (for a nursery! so cliche!), but it's really a gorgeous color. The bigger undertaking was my plan for the ceiling- STRIPES! I had seen a few inspiration images with striped ceilings, and fallen in love. Dustin tried everything to talk me out of it, but it was too late. My heart was set on it. Thank goodness (again!) we had help!
Taping off the ceiling was quite a task- it took three of us, a laser level and a math degree, but we got it done. (in this first photo you can see that we tried no less than four variations of grey for the ceiling. I had the paint mixed at least twice, and hated both, so I eventually resorted to mixing white ceiling paint in the grey until I deemed it acceptable. See? Signature move!)
 (look at my mom- what a trooper!)

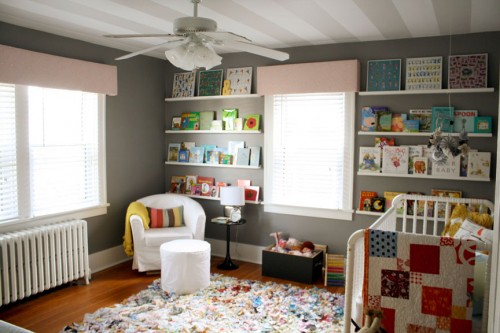
And it ended up being everything I dreamed of. (Just to be extra thorough we painted all the trim with a fresh coat of white. Nothing is too good for our baby!)
The other thing I knew I couldn't live without (dramatic is my decorating style): a chalkboard wall. Dustin happily obliged, but in hindsight we should have realized we wanted it to be magnetic before we painted with the chalkboard paint. Could have saved us hours of work....but I digress.

Next big project: The changing table dresser. We were super lucky to get a dresser for free from my mom's neighbor. It wasn't in the best shape- note the giant hole in the top, accompanied by circles of putty from the previous patch job...
 We ended up having to do this piece twice, after our first attempt to patch the hole with wood filler and cover with veneer was a big bubbly failure. (of course we didn't know it failed until after we painted it. The nursery was becoming headquarters for Murphy's law at this point). The second round we added a sheet of flat white-board paneling, which did the trick.
 But the fun didn't stop there, It was time to rope Dustin into another "looks so easy, but will end up taking you all day and temporarily squelch your will to live" type of project: Converting an old ikea chair into a glider/rocker. It seemed like a simple enough concept- purchase an old recliner from craiglist, take off of the base, attach it to our existing chair, done. And in theory it was that simple- it just wasn't easy. If the base wasn't in the exact right spot the chair would tip funny, leaning too far to the front or back. Poor Dustin had to try about five different times to get it just right.
 But his persistence paid off. We're rocking now!
At this stage in the game, I think I kind of ran out of steam when it came to documenting the rest of our progress. The big big projects were out of the way, but the list of to-dos was still daunting, so we put our heads done and set about gettin' 'er done. We tackled:
- making "pelmet boxes" for the windows- a job that took an entire roll of duct tape, a glue gun, a staple gun, and wall brackets before successful completion. (nevermind the fact that I had to go through two rounds of fabric before finding one I liked)
- sewing an ottoman cover (my first time making my own piping!), and an adjustable crib skirt (so refreshingly easy!)
- assembling a rug- We spent roughly an hour comparing rugs at Ikea (not to mention weeks of online research), finally purchased one, only to get it home and hate it. Then inspiration struck when I found a doormat sized rug that I loved- I decided to give it a shot and order six, with the plan to assemble them into one giant rug. It worked out beautifully- but only after I ordered another round of six rugs because I wasn't totally thrilled with the color mix of the first few. We chose our favorite of the whole bunch and made one large rug. It's quite possibly my favorite thing in the room (which is really saying something). It's totally one of a kind, and was just as cheap as any other option we found.
- building book ledges- This one was super easy (for me!) because I had the dream team of workers- Dustin, my dad, and my step dad. They custom built all eight shelves in one morning!
- painting and hanging the frame collection- I painted a ton of frames we had laying around, found and made art for them all, nailed them up to the wall....and....hated it. It looked great by itself, but once we had all the books on the opposite wall, the room was just getting too busy. And the nails weren't working out well either- I was worried it would be all too easy for little roaming hands to knock them off the wall. So we started this project over too- stripping all the art, filling the holes, and instead attaching the frames to the wall with velcro. In the end, I much prefer this look, and it takes advantage of the chalkboard wall much better than the initial attempt.


I think the only thing that would make this room better is having a little girl to sleep in it at night. Guess we've got one more thing on the to-do list after all.


I really love the room and love you guys. You both are such an inspiration to us with all of the hard work you put in and the beautiful results that come out! Can't wait for that baby to come!
ReplyDeleteI saw the photos when Rachel posted the link on Project Nursery. I completely love it, especially using the books as wall art. You're going to have a very happy baby!
ReplyDeleteYour Nursery is Awesome! Great Job! That Chalkboard/gallery wall combo is cool.
ReplyDeleteLOVE this room. I was wondering if the dresser turned changing table had been practical? I have a dresser I'd love to refinish into a changing table, but I'm thinking the height might make it impractical. Have you had any issues with feeling like it's too short?
ReplyDeleteThanks Danielle! We haven't had any trouble with the height of the dresser...It works great! the one thing that is helpful though, is that we have a basket on top for regular diaper changing supplies. I've found this is much easier to access than putting things in the drawers. We store extra diapers, clothes etc. that we don't need to get five times a day in the drawers. (and because we're trying to cloth diaper which requires more, and bulkier, supplies- we've switched out to a larger basket than the one pictured.) Good luck!
ReplyDeleteLong story short; pinterest ~> project nursery ~> your blog ~> recommended post on Rockbridge. I'm an Area Director for YL outside Richmond, VA and my wife and I are expecting our firstborn this October. We've been doing some home/blogging stuff and I love every part of your nursery. I'm really excited to show her your blog and will potentially be "stealing" a bunch of your ideas....hope that's alright ;) You guys did an awesome job. Well done!
ReplyDeleteIf you want to stop by our blog it's www.tommyandellie.com
Courtney, I absolutely love this room and have stolen this for my baby's nursery (also a lil girl). Just like your room I have a great dresser that i want to convert. wondering what color yellow you used as I am having trouble finding something I like.
ReplyDeleteYou did an amazing job! Love everything in your baby's room!
ReplyDeleteLove this room!!! Lots of inspiration!!!
ReplyDeleteI LOVEyour nursery!! Where did you get that adorable yellow throw?
ReplyDeleteaw thanks Britney....It's from Meijer, but I don't know if they have them anymore. But try googling "pom pom throw"- there are a ton of options! Good luck!
DeleteI really love your chalkboard gallery and your nursery as a whole. You guys did such a wonderful job.
ReplyDeletehave featured the gallery wall on my blog as one of my favorites: http://www.thelovenerds.com/2013/03/gallery-wall-pinspiration.html
Maggie @ thelovenerds.com
Hey Maggie....glad you liked it! it's one of our favorite projects too!
Delete