

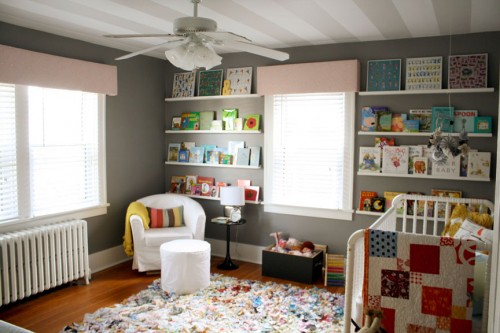
Quilt: Miller's Big Boy Quilt
First up is a new quilt for our fav little man. He was still sleeping with the baby quilt I made him years ago...He loved it (and so did I!) but as his feet started to poke out of the bottom, I figured it might be time to make him something a bit bigger, and a wee bit more grown up. I was worried he actually wouldn't want to make the switch (he gets very attached to his things...after years I still can't convince him to sleep on any pillow other than his doggie pillow pet!) but he actually loves his new quilt just as much as the old one. I wasn't sure if he would miss the familiarity of the old one, or if he would think the new one was too plain (no animals!) But he seems to really understand how much work went into it, and gets that it's pretty special. That or it just keeps his feet warm.

- Timeline: Started November 2018...I think I put in a month-ish of work (Black Friday and Christmas break tend to be a very quilty time for me) and then let it sit for a literal year. I had finished the quilt top, but was unsure about one of the stripes (wasn't sure if I was feeling the white). So I mulled it over, mostly forgot about it, and didn't pick it back up until the following December. I ended up leaving the stripe as-is...it must have grown on me (subconciously) while it languished in the basement. When I resumed, I still needed to piece the back, quilt and bind it. This quilt is twin sized, so it's substantially more time-consuming than baby quilts, so at least I'm semi-justified in my procrastination/snail's pace. But what matters is I did eventually finish it...in January 2020.
- Quilt pattern: Suzy Quilts "Weekend Candy". This is my second time making a Suzy Quilts pattern (the first was Bayside- my Christmas Quilt) and I already want to make more (I bought Triangle Jitters a long time ago, but haven't done it yet, and I've had my eye on Maypole forever.) It appears this particular pattern isn't available anymore (BUMMER!) but you can see examples of it via the IG tag: #weekendcandyquilt. It's a really simple pattern, based on big pieces, rather than lots of smaller blocks, which makes it come together pretty quickly. (I mean, provided you don't take a year long break). I love the look of the stripes- really simple, but still has lots of visual interest.


- Fabric: all from Joann. It's mostly quilting cotton, with some lightweight denim, seersucker and linen mixed in to give it a bit more richness. I wanted it to have a masculine feel, and based the color palette in Miller's bedroom. It's a lot of primary colors, so I had to be careful it didn't veer into "clown" territory but the range of blues seems to help ground everything. The pattern requires about 13 fabrics, so it was a bit of a challenge to find that many options that I love- AND that work together well. In the end though I'm pretty pleased with the mix. The grey and white seersucker might be my favorite, but the dotted swiss denim (used on most of the back) is drapey and divine too.


- Backing design: Why oh why do I make everything so hard on myself? Now remember- I don't actually know anything about quilting...I'm just trying to pick up/make up things as I go along, but for the most part it seems quilt backs are typically pretty plain. Most often it's just one big piece of backer fabric. But not mine! I love giving the backs a little love too, and incorporating elements from the front to give it double the interest, and make it feel cohesive. So for this one, I did a simplified version of the front with some big horizontal and vertical strips. I just improvised this side based on the fabric remnants I had leftover, but I love how it turned out. This whole thing sort of reminds me of his sisters' quilts with the big pieces and geometric layout.
- Quilting design: Simple, straight vertical lines, set apart at varying widths.
- Media of choice while I worked: Mostly Christmas movies (Hallmark and other classics) a few seasons of Working Moms and a bit of Fuller House.


- New thing I tried/learned: Remember when I said the quilting design was "simple"? Wellllllll...with me, nothing ever is. I had quilted a twin sized quilt on my home machine once, and had experimented with a longarm once before...So I knew I could make this work at home, but thought it might be worth another try on a long arm. Fortunately- Joann's has one that you can rent time on- they have experts who help get you all set up, and then you just go to town! (You can reserve a block of time, and you pay by the hour). It's pretty awesome to have access to an insanely expensive piece of equipment...but the experience was not without its challenges. First- I found that the long arm wasn't actually as long as I needed it to be to do what I want. I envisioned my stitches going longways (parallel to most of my stripes) but it wasn't possible (or was at least much harder) to set it up on the machine that way. I didn't want to compromise my vision, so I thought it might be a deal breaker, but I eventually finagled a way to make it almost work. So after what felt like a million hours of set up I finally got to actually sew. (At this point I was starting to feel really guilty about being gone so long- and frustrated by my complete lack of progress- because Dustin was home with all the kids. Typically I quilt at night after everyone is in bed, so my time is my own, but this required daytime work, which felt like a bit of an indulgence). But I wouldn't exactly say I was off and running. I had all kinds of issues with my tension, and my thread kept breaking, requiring me to stop, re-thread, and start over, again and again. I reached out for help a few times, but after pouring a few hours into the ordeal with not much to show for it, I decided that even with my home machine's limited capacity, I'd probably still be better off finishing it up that way. So....that's what I did. It still took forever (there's no getting around that, really) but it wasn't that hard. I may try the long arm again (maaaaaybe...someday...) but for now I'm content with just getting the bare bones job done on my own. (Oh- and this saga is already WAY too long, but for the record, I did run into an issue with color bleeding. It may have been from the super-saturated blue denim- or it may be from my thread- I used a different kinds than normal since I was using the longarm. But after washign it, I saw a few of the lighter stripes looked a little dingy, and had some blue bleeding on to them. I've tried- unsuccessfully- to fix it- but have now just resigned myself to it. It's not really noticeable- I might be the only person who can truly tell- so I just chalk it up as a lesson learned: prewash your fabrics, use color catchers, don't machine dry your quilt until you check it for color bleeds).


- Final thoughts: I'm really pleased with this quilt. It's colorful without being crazy, and is so soft and cozy. It's also fun enough for a four year old, but feels like it will have longevity to "grow" with him over time. Miller loves it, and was all too happy to be a part of the photoshoot to show it off. He also requests to bring it in the car with him sometimes (that's a hard NO, buddy) so I'll take that as a big stamp of approval.

--------------------------------
Quilt: Little Boy Blue
Next, is my very first Quarantine Quilt! A good friend of mine was due with her first baby in May...which meant we didn't get to celebrate her properly. But just because she didn't get a baby shower doesn't mean she shouldn't get showered with love. (And no- an Amazon gift card wasn't going to cut it...even though that is technically what we got her). This sweet, longed for, prayed for, miracle baby (and his sweet, patient, generous, really stinking fun parents) deserved something special.

- Timeline: May 2020. I think this might have been my fastest quilt yet...I had a headstart on it, as I had a lot of squares left over from my last round of baby quilts, so that reduced my cutting time by quite a bit. All told, I got this little guy done in 5 days (working an hour or two per night)- pretty convenient for a baby who came almost 3 weeks early!


- Quilt pattern: A gingham design- the same I did for some previous baby gifts. It's a simple, classic design and I love how it turns out. This version doesn't follow an actual pattern- I just based it on this inspiration image. The finished quilt is about 32"x44": 8 squares wide and 11 squares long. Squares are cut to 4.5", with .25" seam allowances, for a finished size of 4" each. It uses 24 squares of the dark color, 44 squares of the medium color and 20 squares of the white
- Fabric: I didn't buy a thing! Ok- I'm starting to make this present seem not that nice (it took five minutes! and it was all scraps!) But I'm I'm actually really proud of being able to put this together entirely out of supplies in my stash. I had fabric left over from the other baby boy quilt I made, and you know I'm always good for a pile of pretty grey prints. It was kind of a fun little challenge to "make do and mend"- trying to make something special out of just what I have on hand. I also like it when I "share" fabrics from one quilt to another...makes it feel like they're all connected like a literal "common thread".


- Backing design: For this one (and all my gingham quilts) I did a plain backer. Just feels so classic- which is the core of what this quilt is. I used an adorable little hedgehog print (Prickles from the Cotton + Steel sleep tight collection). I've had it for years (I got it in a subscription box from Cotton Cuts) but never had the right project for it. But when I started this quilt I knew it'd be the perfect match to go with the preppy vibe and give it an extra does of cuteness.
- Quilting design: straight horizontal and vertical lines- spaced evenly on either side of all seams.
- Media of choice while I worked: Working Moms Season 4


- New thing I tried/learned: actually cutting my squares to a precise size. Funny how much of a difference that makes! (don't get me wrong...there are still some wonky bits because "Perfection" isn't exactly my making mantra- but there are some points that came out looking NICE and I'm starting to see how being a little less antsy in the cutting stage pays off in the end).
- Final thoughts: This may not be the most impressive quilt...but I love it all the same. It's simple and it's sweet, just like the new babe who gets to snuggle it. (Ooh- and fun side note: the friend I made this for, is actually the same friend who made my quilt tags, so she ended up having a hand in her own gift. I think it's extra cool that her baby will have a little bit of his mom's handiwork built into his quilt!)
--------------------------------
Quilt: Little Bunny Frou-Frou
The second edition in my Corona Baby Trio is a quilt for my childhood best friend's little sister. I met my BFF in the first grade, so I've pretty much known her sister since...forever...(we so old) So it's beyond fun to see her starting a family. AND BONUS- she knew the gender, so I got to indulge my girlie side and embrace PINK! (I love a neutral theme as much- or more- than the next person, but sometimes it's just fun to go all in on the stereotypical sugar and spice!)

- Timeline: May-June 2020. I had a hard deadline on this one, so I had about a week to make it happen in time for a baby shower. Just for fun, I tried to keep track of how long this quilt took me start to finish (I always wonder how much work goes into them...and it's interesting to me to see how the time breaks out over the various stages of the process). If my loosey-goosey records can be trusted, this quilt took around 11.5 hours. And for the real data nerds among us, here's the full breakdown:
- 45 mins- choosing fabric/determining the layout (normally this would be done in a store- following the yardage guide of the pattern, but since this is Quilting in the COVID age, it involved me rifling through my piles of options, trying to match my supplies to the pattern needs)
- 2 hours- cutting pieces (I think this was a bit slower than normal because I was pretty picky about how all my prints were going to work inside of the pieces...I wanted my bunnies just so...)
- 2.5 hours- sewing top (This might be my fav part of quilting...it's fun to see the pieces actually start to turn into something...)
- 15 mins sewing tags (I did two at once...so it barely counts, but still)
- 45 mins cutting/ironing binding (I made my own binding for this one, so that was more time-consuming than usual)
- 1 hr cutting/sewing back (Made up my own simple pattern)
- 30 mins trimming/sandwich basting (not actual snacking...but making the "quilt sandwich"- spray basting the front/back to the batting)
- 1.5 hours quilting (Literal quilting might be my least favorite part of overall quilting...probably because it's the step I'm worst at.)
- 30 mins trimming (Because everything is always a bit wonky, no matter how hard I try to keep it square)
- 1.75 hours binding (A step I oddly enjoy...maybe because it's kind of mindless, and at the end...you have a quilt!)


- Quilt pattern: Suzy Quilts "Weekend Candy" (again!) I liked it the first time, and thought it would be fun to try in a different size. Plus I knew it would be a quick project (vs. experimenting with something new, and potentially getting myself in too deep).
- Fabric: This was another one pulled all from my stash- again with some gems I had been saving from my Cotton Cuts subscription box (From 2017...hoarder....). The main stars of the show were from a collection called "Folkwood", which I unfortunately can't find anymore- but it was by Rae Ritchie for Dear Stella Designs- and both of those have some beautiful things. I also mixed in some of the hedgehogs and other neutrals from the gingham quilt, and some more subscription box finds: Riley Blake Rose Gold Basics and Little Town Tree Farm Candied by Amy Sinibaldi. It was so fun to cobble together old and new...there's even a little piece of pink in there that I used in my daughters' quilts, so that was a neat little nod to my little girls.


- Backing design: Went simple on this- a solid backer with 2 horizontal stripes. I wanted to keep the focus on the woodland creatures, so I added just enough to give it a little something special without making it too complicated. (I'm often guilty of "gilding the lily", so sometimes quilt design is an exercise in restraint...)
- Quilting design: straight vertical lines. Surprise, surprise! But to be fair- even if I knew how to do something more complicated, I think this would still be the right choice for this quilt. I just went on either side of the vertical seams (skipping the super narrow pieces)- so my stitch lines were in varying distances across the width of the quilt.
- Media of choice while I worked: The Person You Mean to Be (Audiobook), an IG live by a local pastor, and various other race-related videos. (You can tell this timeline spanned over #blackouttuesday and my media consumption took a turn from Netflix fluff to more serious study.)


- New thing I tried/learned: Well- it wasn't the first time I made my own binding, but that is out of the norm for me. I typically use double fold bias tape, but I was all out...and when I went to Joann's to get batting the bias tape shelves looked just like the grocery store toilet paper aisle: empty. I hadn't realized that people were buying them out for use on handmade masks (I knew elastic was in short supply...) so I had to pivot, and go with regular fabric to make my own binding strips. It was easy enough to do (I sort of kind of followed this tutorial). It made me laugh a bit though- all these lessons that quarantine is teaching me...I'm so used to convenient solutions (like bias tape binding or store bought bread) that I sometimes forget that there was a way to make things before all of that was invented or widely available (like regular fabric or sour dough starters...) This particular project did require a trip to the store, so it broke my "use what you have" rule- but now I'm stocked on grey binding for the foreseeable future...and armed with the confidence to more again if needed.
- Final thoughts: This one was a little outside of my wheelhouse (I am usually not this prissy precious) but it turned out really sweet. Fin was especially smitten with it, and is now requesting a new quilt for herself...with bunnies.

--------------------------------

Quilt: Charley Harper Flies Again
Whew...are you still with me?! Last one...and it's a beaut. (if I do say so...and I do!) This is a particular favorite of mine because it's a repeat of Miller's baby quilt, which I just adore. (But I say that about all of my quilts...soo....)
- Timeline: May 2020 (in preps to give to a coworker/friend of mine to welcome her first baby!) This one had quite a lot of piecing to do- but again I had a headstart because I actually had a lot of half square triangles already sewn. I don't know why I had so many left over (I vaguely remember not really having my process down when I first made this pattern, so I think I made more than necessary...) So while this was a pretty labor intensive quilt (even at a small size) I had a lot of work done already, and the remaining work wasn't complicated...just takes a little while. I think this one took me a week or so, dedicating quite a few after-bedtime stints to get it done.


- Quilt pattern: It's pretty much a copy/paste from Miller's quilt, following a tutorial from Film in The Fridge. I simplified the layout a bit though, and did half square triangles for every other square, and plain squares for the rest (adding small pieces randomly to the corners of those).
- Fabric: All the Charley Harper fabric were hand-me-down leftovers from a friend/fellow quilter of mine. I love that fabric she used to make a baby gift was given to me for Miller and now has another life in a gift for another friend. The solids were mostly remnants of his quilt too, with some other odds and ends thrown in there. I had everything I needed except the backer, so I found a cute grey print at Joann to work with the rest of my collection.


- Backing design: I continued the triangle theme, going with something similar to Miller's (it uses the same terracotta dot fabric that his has) but slightly simplified.
- Quilting design: you guessed it- straight lines at varying intervals...but wait!...this time on the diagonal to line up with the triangle lines. (This is what I did on Miller's and it works perfectly with this quilt design).
- Media of choice while I worked: Dead to Me Season 1 and 2
- New thing I tried/learned: Honestly I'm not sure anything on this one was new. More so I just refined some of my skills. I think (I hope) I get a little bit better and faster each time I make a quilt...making fewer rookie mistakes and avoiding some of the overthinking that stresses me out.


- Final thoughts: This quilt was just a pleasure to make. I get pretty sentimental about this stuff, but it is just endlessly special to me to have something that brings me so much joy, and get to give that something to someone else. You know when you introduce someone to a movie that you loved as a kid, and you sit there watching them watch it, hoping they laugh at all the same parts you think are funny, and cry at all the parts you think are sad, borderline ruining their entire experience with hype and pressure? Yeah. That's pretty much me when I give a quilt. DO YOU LOVE IT?! BECAUSE I LOVE IT!!! OH I REALLY HOPE YOU LOVE IT....DID YOU SEE THE BACK? HERE, LET ME UNFOLD IT FOR YOU. I'LL JUST WRAP IT AROUND MYSELF REAL CASUAL FOR A MINUTE...MAYBE STROKE MY FACE A BIT. DID I MENTION THIS IS THE SAME STITCH LENGTH I USED ON A BABY QUILT FOR ANOTHER BABY WHO HAS THE SAME MIDDLE INITIAL AS YOURS?! AAAAAWWWWGHHHHHH.

--------------------------------
All Quilts:
Custom tags: Mission Market Co.
Machine Binding Tutorial: Cluck Cluck Sew
Chain piecing tutorial (for Charley Harper and Gingham): Who else? Suzy Quilts.
Batting: I always use cotton batting (though I want to try a poly blend sometime to get a bit more loft- aka puffiness). And I always do precut (vs. by the yard) because it's easy to match that to the size of your project. There seem to be some differing measurements for baby quilts- mine are 34"x45" which I think is technically called "craft size" (crib size batting is 45"x60"). Make sure to check your pattern. And I've gotten various brands over the years but these were all made with Pellon White Cotton Batting.
P.S. See more quilty goodness (yes...seriously there is more): on the blog, or on IG via #bowdenismsews
--------------------------------------------
Psssst....Want to get all the Bowdenisms news delivered right to your inbox?
YES PLEASE! Subscribe via email and never miss an -ism. xox.


No comments :
Post a Comment