
Well, I haven't been doing a lot of blogging lately, but that doesn't mean things haven't been busy around here. I've actually got a pretty big update to share, and it's all about making babies...
............................
BABY QUILTS!
yaaaaaaaaaaay!

The last quilt I made was a BIG endeavor, so after that one I took a BIG break. But then my sister got pregnant, and I knew I had to come out of semi-retirement to wrap that little bundle up properly.
With every quilt I do (you can see them all on the blog, or via #bowdenismsews) I aim to try something new. And this time I tried.... KEEPING IT SO SIMPLE. That is basically the opposite of all of my instincts, so it was ironically, pretty hard. I am much more adept at being overly ambitious, complicating every detail, going about it all the most difficult way imaginable, and getting myself in WAY over my head with visions that don't match my skill level.
But not this time! I had an adorable pin as inspiration...and that was it! I was off to the races.
Yes, I spent at least an hour at JOANN torturing my mom/shopping assistant with endless hemming and hawing over fabric selection, but that's to be expected, right? She found the adorable backing fabric, and I settled on the two purple florals to serve as my "gingham" squares.
But before I blather on too much (more) about the details of it all....let's just look at her for a minute:


:overenthusiastic singing:
Isn't she lovvvvvvely....made from love.


I started this quilt about a week before my sister's baby shower, so time was of the essence. The good news is...simple means fast (well...fast-ish...I'm still no speed demon with these things). I followed SuzyQuilt's chain piecing tutorial, which made sewing the squares together quick and easy.
I've never made a quilt with a one-piece back before, but I thought it was a good fit for this quilt top (keep it classic, and classy). Plus my new niece's room has a woodland animal theme so featuring this little forest scene felt perfect.

I had so much fun making this little piece. It was nice to do a simple pattern. Usually I love the planning part of the process, but it was honestly relaxing to just sew. I didn't have to agonize over measurements,or double check everything was working out how I imagined. There was no troubleshooting or forced improvising. I just sat down each night at my machine, popped my ear buds in, and stitched and podcast-binged my heart out. And of course it didn't all turn out perfectly (don't zoom in too closely where all of the corners meet up..or don't, quite...) and I still had my fair share of stitching re-do's and tension issues (mechanical, not emotional) but when all was said and done...I was proud of my hard work and in love with what I made. (Hey...it IS just like having a baby!)
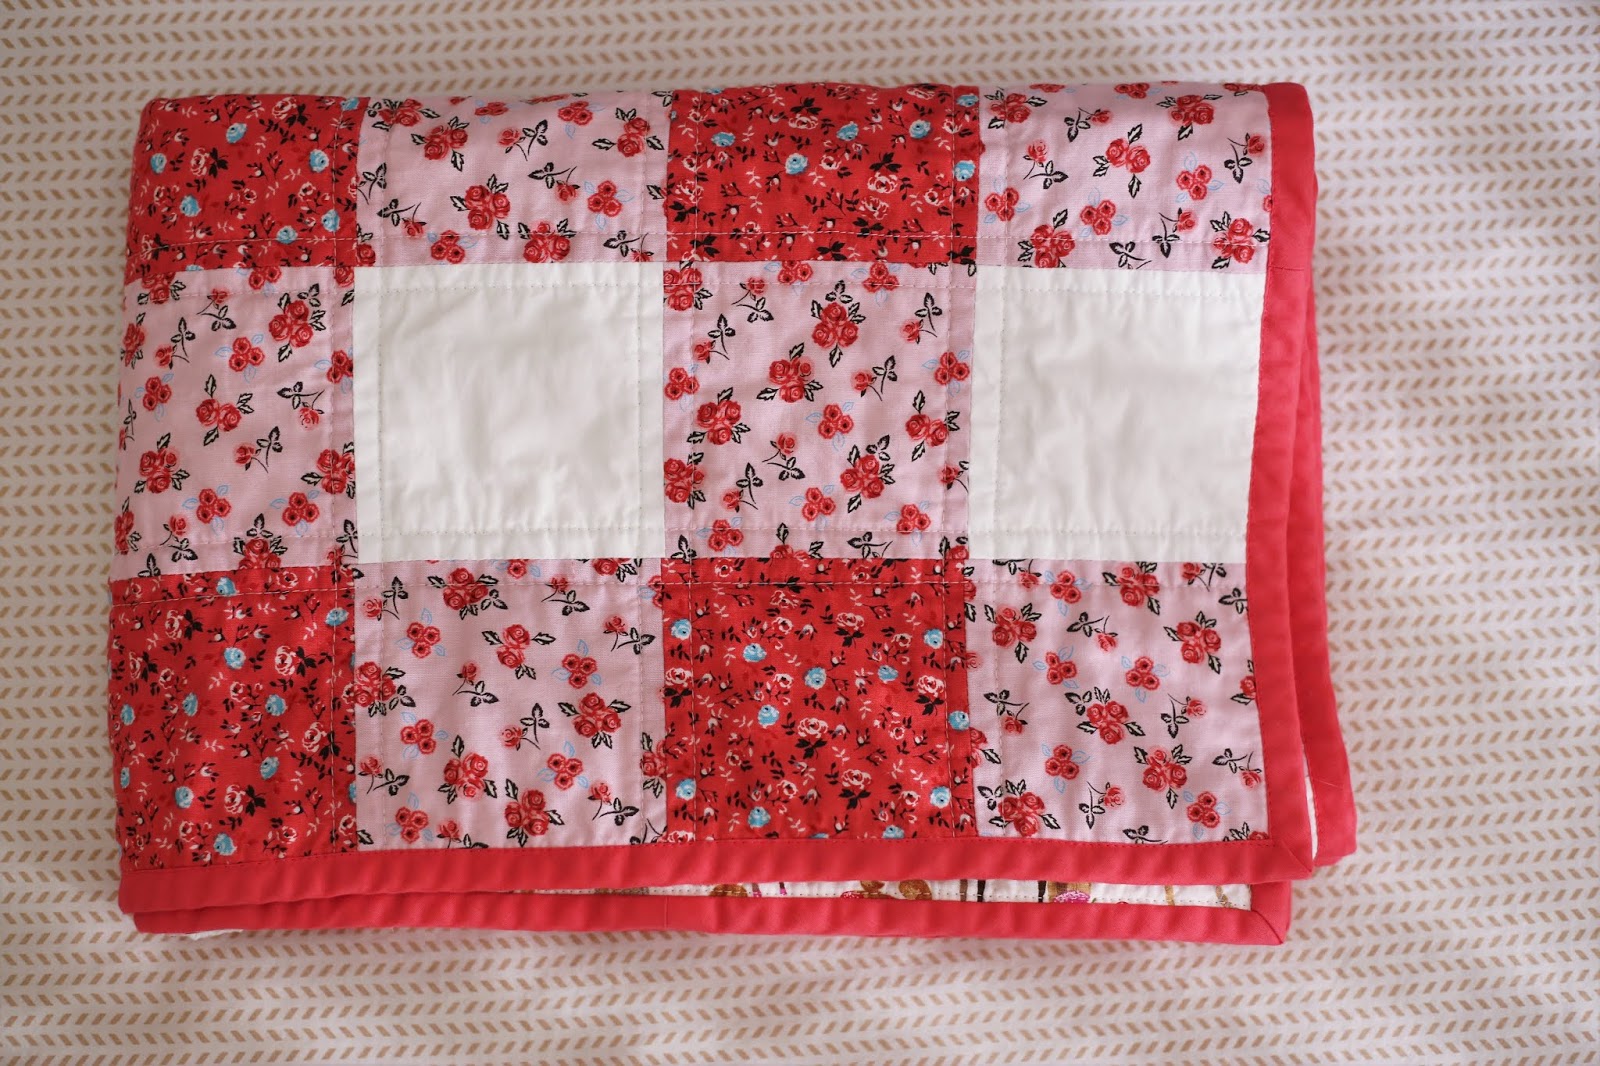
So you know what had to happen next, right? Yep, Violet needed a little quilted sister. Meet Rose.

Practically twins!
This one was for a friend of mine...I used the same adorable backing fabric but paired it with a pink/red liberty floral top. After finishing up the first one (and learning a thing or two), this version went even a little bit faster. That wasn't necessarily my goal, but is such a satisfying feeling to whip these up from scratch in just a few days. (If that's how pregnancy worked I'd have a lot fewer baby quilts, and a lot more babies).
I did my own quilting on all of these (baby quits are small enough to be easily managed on my home machine), and I kept that simple too- just doing straight lines on either side of all of the seams. (I use the word "straight" loosely, of course).
I love how simple they are..but so snuggly, soft, and pretty. (You know...just like babies!)


And now that I had two little lady quilts....you know what I had to do next...

Yep, give them a little brother.

This one was a birthday gift for my best friend's one year old. I coulda, woulda, shoulda made him a baby quilt for his actual birth, but sometimes sewing + life just doesn't work out like that. So I poured my love into it now, and tried to make my fabric choices extra-manly to please the sweet little guy he's becoming. I don't think he'll mind the delay...especially when he's all cozied up and sleeping.
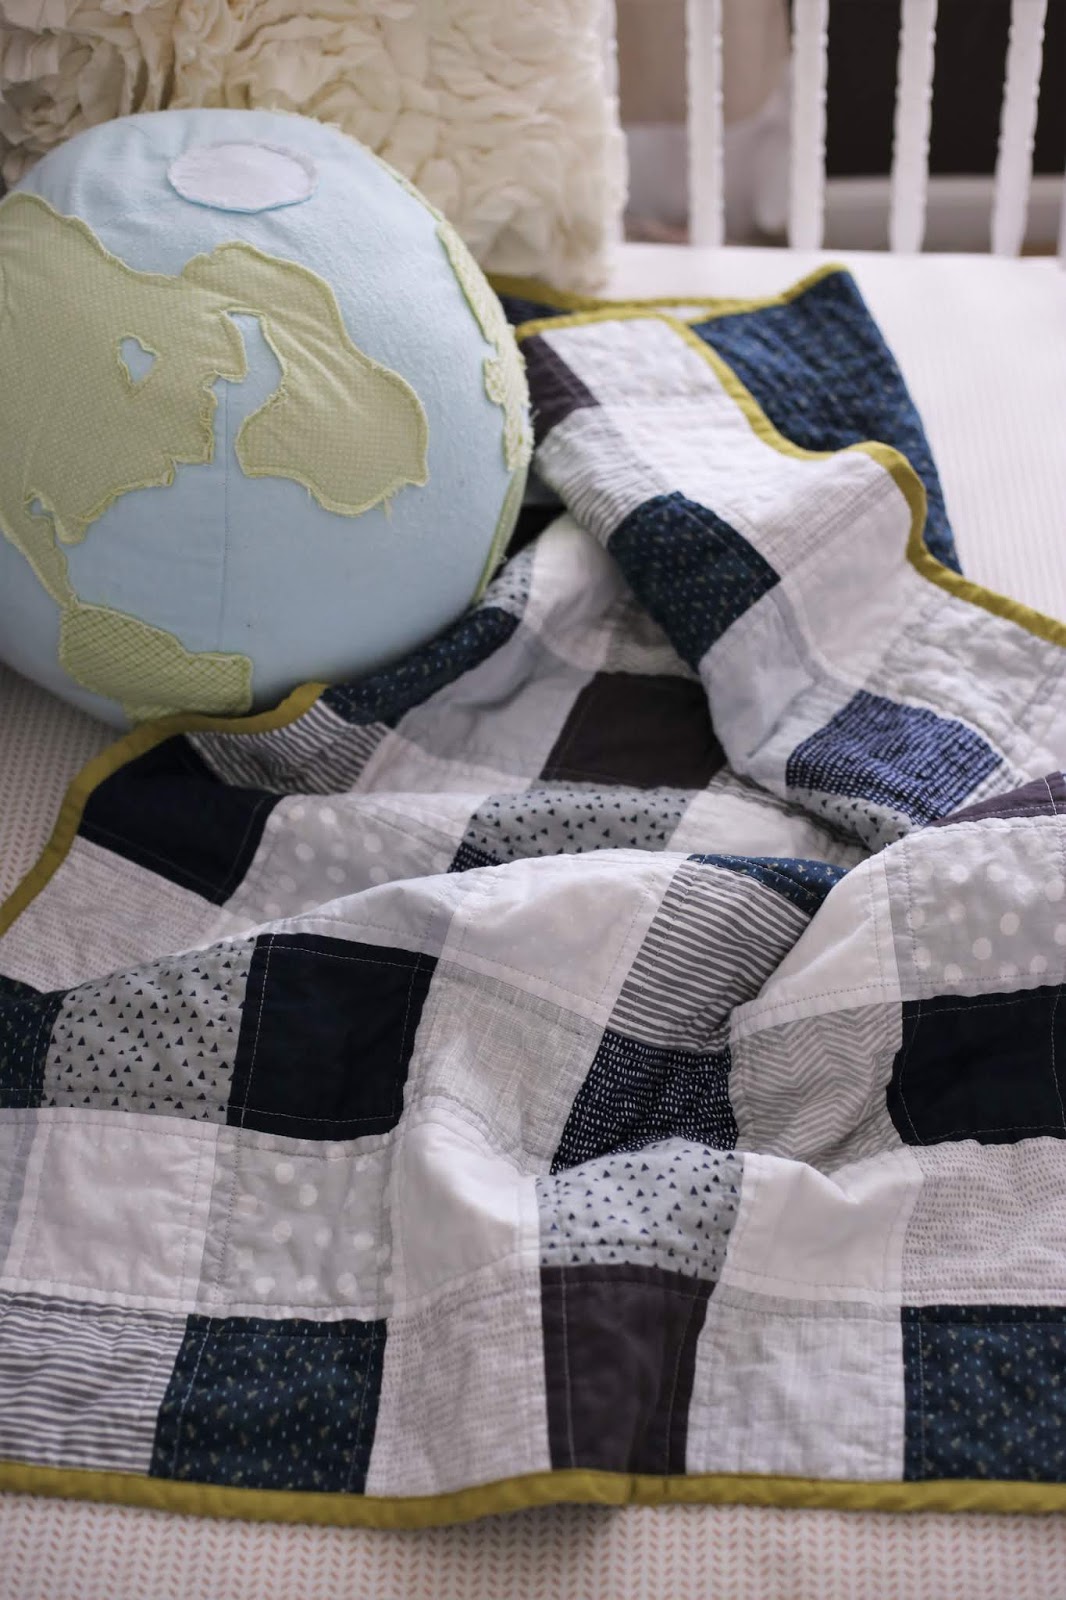
I tried something different for this one, still using the gingham pattern, but mixing in different fabrics. I chose about 3 fabrics for the dark blue (using the backer fabric for some of it, to bring it all together), 2 fabrics for the white (one plain, one with tiny white dots) and a big mix of things for the grey. It was extra special to me that I got to use some scraps I had from previous quilts, so his has pieces in common with my kids' quilts.


I chose a pop color for the binding (coordinated with the detail on the backer fabric) to keep it from being too serious. (I always use Cluck Cluck Sew's machine binding tutorial) I was a little nervous about that choice, but when it all came together I was smitten.

And did you see that little sneak detail in the corner...

Aw, yeah...I'm legit now, baby. Real deal personalized tags!! My girl Carrie from Mission Market Co. answered my late night "Can we make these?!" texts with some professional level beauty!
They are better than I even dreamed, and now I want to make 10,000 more quilts just to be able to add these little labels. (Seriously, Carrie is next level with all things lettering/craft related...and she does custom orders for just about anything you can imagine.)

So there is the story of The Bowden Triplets. I crafted them with my whole heart, and now my beloved babies are off to their forever homes...The good news is I think making someone a quilt translates to a lifetime right to free snuggles, so I think my efforts are going to be well rewarded.
.............
(Psst: If you're into the details, each quilt is 8 squares wide and 11 squares long, and uses 24 squares of the dark color, 44 squares of the medium color and 20 squares of the white. My squares were cut to 4.5", and I used .25" seam allowances, so they were all finished at 4". It ends up around 32" x 44". This works perfectly with precut batting (around 34" x 45"). I wasn't too strict on my math when I was buying fabric, so I ended up with more than I needed, so I don't have a yardage guide to share...if you think it through just a little you should end up in a better spot than I did. The backer piece can just be cut to around 48" though, which gives you a tiny bit to play with, and very little waste. You'll need about 4.5 yds of binding- I used two 3yd packs of double fold bias tape. All supplies are from JOANN).
--------------------------------------------
Psssst....Want to get all the Bowdenisms news delivered right to your inbox?
YES PLEASE! Subscribe via email and never miss an -ism. xox.


Doing this checker pattern has been on my "quilt to-do list"! They turned out wonderfully!
ReplyDeleteThanks! It really is super easy...but ends up looking great. That’s my kind of quilt! :)
DeleteBeautiful baby quilts! I'm curious, were your fabrics from Joann's also? Thanks!
ReplyDeleteYep! Everything was!!
ReplyDelete