A special person + a special occasion calls for one thing: a special quilt!
My niece is moving to Arizona for college (she actually started her road trip there yesterday morning, so should be arriving in Phoenix in a few hours...depending on how many times her Dad and her cat wanted to stop for snacks!), and she asked me to make a quilt for her dorm room. And like most things in her life- Ali knew what she wanted! (I like that in a girl!) This is the first quilt I've done "by request"...she had seen the "Night Sky" quilts I made for my friend's babies, and asked if I could make a grown up version of those. That of course meant scaling it up for a "big girl bed" but she also wanted it have "out west" vibes, with neutrals, and her favorite color: coral. Kind of like a desert sunset. I caught her vision, and was up for the challenge. At the time, her departure was about a month away, so I figured I'd have plenty of time to knock it out...after all, I had just made two just like it...how hard could it be?
(and that, dear readers, is what they call foreshadowing...)
But we've got enough sadness with our beloved Ali leaving...let's focus on the happy parts of this project. Like- the finished product!
Oooooh.Ahhhh.
(in blog land you have to be your own hype girl)
Now do a little twirl:
No, not like that, I mean let's see the back!
- Quilt Pattern: I based this off of the NightSky Quilt by SkyClad Quilts, but that pattern doesn't go up to a twin size, so I had to modify/improvise. Mostly that just meant buying WAY more fabric (which is still somehow never enough) and playing around with the layout to get the "mountains" to look right. This pattern is a little hard to without wasting a lot of fabric (last time I was able to use the leftover yardage from one set of mountains to make another similar set of mountains for the second quilt. No such option for this big singleton.) and I haaaaaate wasting fabric (call me cheap- but I prefer efficient) so I had to finagle things a bit to get it all to work. That's the problem solving component of quilting, which- when it isn't making my brain hurt- is actually part of the fun.
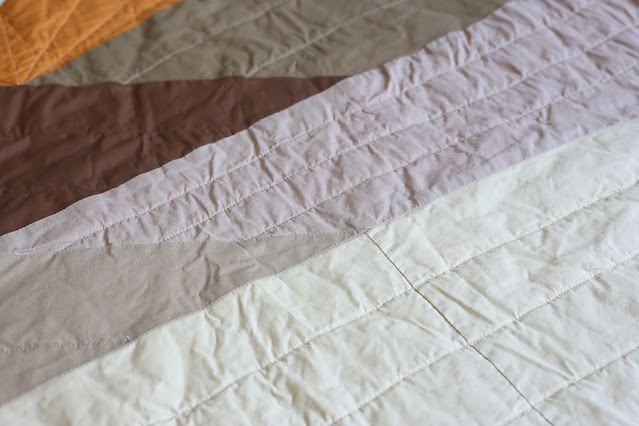
- Fabric: Like the baby quilts, this was all solids- a mix of JoAnn's basics and Kona Cotton. I really struggled to get the colors to work with each other...I must have tried every combo under the (desert) sun. To some degree, I was limited by what was available in stock. I got the bulk of my fabrics at JoAnn (I'm a sucker for a coupon), but eventually I hit up a specialty shop, Quilt Beginnings, for some harder to find shades. I played around with a ton of layouts, and eventually settled on a gradient I thought worked. (Maybe I finally called it done when I felt satisfied with the selections. Maybe I stopped when Piper and Little Miss ran out of patience comparing nearly identical shades of beige. Hard to say.) I wasn't quite sure what I was going to do for the back, and got a little nervous that nothing would be quite right (sophisticated prints can be a little hard to come by in a sea of classic country, seasonal and whimsical options) but when I found this Oasis Modern Geo I knew I had a winner. My kids were skeptical (I think they just don't really "get" brown) but I follow enough younger-than-me, cooler-than-me influencers to know the color combo and arched lines were going to be perfect.
- Backing design: I had every intention of making this easy on myself, and just using the single fabric for the backer. But alas, my calculations fell a weeeee bit short, and I didn't quite have enough fabric to make the finished quilt the length I needed. So I improvised (an ongoing theme in my quilting adventures) and decided to add a little set of stripes to the back. This both made the quilt better (visual interest!) and harder (lining things up!) so I'm not sorry exactly...but it certainly was a choice with consequences. If I had it to do over again, I think I maybe would have still done something special on the back, even if it wasn't to bridge a math-gap (I just love flipping a quilt over to find a little surprise!) But I maybe would have thought through how the front and back were going to work together so the actual quilting part wouldn't have been so tricky.
- Quilting design: Ok...I can never quite decide what my favorite part of quilting is (it's a tie between planning a pattern, fabric selection, piecing things together, and sewing the binding) but I'm pretty sure I know what my least favorite part is: quilting. The actual process of sandwiching the layers, basting them together, and then sewing for 1 jillion hours, wrestling yards of puffed up fabric, jamming it all through a much too small machine, adjusting the tension, endlessly switching colors and re-threading bobbins. Yes, the quilting part. Not always a fan. This falls squarely in the "wrong tool for the job" category of problems. Pretty much anything larger than a crib sized quilt calls for a long arm. My machine (ok...and my talent) has its limits- from a size and intricacy perspective, so I can technically do my own quilting but it's definitely not my strongest skill. I have hired a professional quilter before, made use of a friend's set up, and tried renting time on the long arm at Joann, but for the most part I've just been making it work on my own (it's certainly the most economical option...and despite how lonnnnnnnng it takes me, it's still faster than sending it out for someone else to do it). I knew this one would be a little tricky, but ended up being putting it a bit mildly. I followed the same design that I did for the baby versions of this quilt- straight lines on the stripes, diagonals to match the mountain angles, and a sunburst in the middle, so I at least had a little experience with my plan of attack. But I had some trouble with my spray basting (I tried a new product and did not have success...plus it's really hard to find an open clean spot to spray a quilt of this size) so I had to pin it together instead. I've never done that before, and it ended up having areas that weren't quite smooth. Whiiiiiiiich I didn't realize until I was deep into quilting. There were a few areas that puckered and folded up wonky, so I had to seam rip and start over on a few spots. In the end, there are still some spots that I'm less than proud of, but again, I try to focus on the intention and know that it's less about perfect results and more about the thought and effort behind it all.

- Timeline: Will I never learn? Apparently I thrive under pressure (or am a glutton for punishment) because while I had about a month to work on this project, I dragged my feet and didn't really get going until a week before her departure. All told it was about 22 hours of work split over 10 days. I don't love the feeling of my back being against a wall, but it is an effective motivator!
- Media of choice while I worked: Ugh. Nothing great. After the high of watching the Olympics every night (one of the major reasons I delayed putting serious time in on the quilt), I couldn't quite get into anything. I hopped around a bunch of nothing-noteworthy on Netflix, and listened to most of The People You Meet on Vacation. But didn't find anything that kept me entertained and motivated.
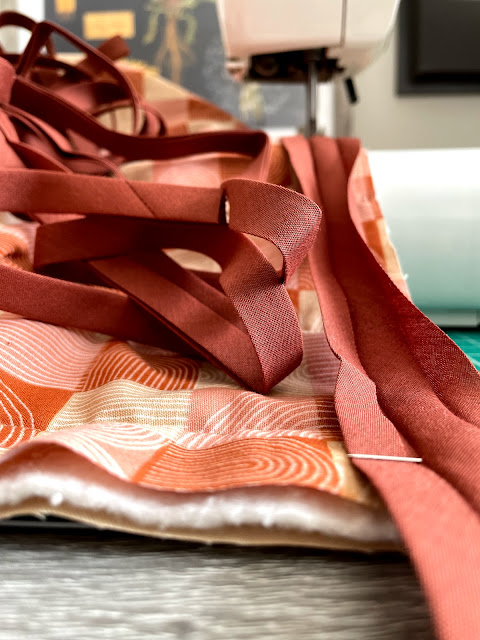
- New thing I tried/learned: This was a pretty improvisational project...partly because it was designed to follow more of a loose plan, and partly because I kept making mistakes that required some pivoting. Noteably- running out of binding when I had literally one inch left. WHYYYYYYYYYY? I refused to admit defeat on the eve of final completion, so I turned that issue into an opportunity for a little extra design detail. I decided to do a little section of pop colors pieced together to bridge the gap in the binding (apparently the unofficial theme of this quilt is: "stripes to the rescue"). I was really nervous that it wasn't going to turn out how I imagined (I didn't want it to look like a patch covering up a mistake...even if that is pretty much what it was) but in the end it's one of my favorite parts of the quilt. It's another unexpected little twist, and a reminder that for better or worse, this is a one of a kind piece.
- Final thoughts: I didn't adore every step of the process with this one...but despite the struggles, there's still nothing quite like the feeling of wrapping yourself up in the fruit of your labor. Or in this case, wrapping someone else up in it. I love all my quilty babies (even if some of them give me more trouble than others!) and I am thankful for the chance to learn and grow (and have something beautiful to show for all the mind-bending work of it all). We're going to miss Ali, but I'm excited for her Arizona Adventures, and happy to be able to provide a little piece of home to bridge the gap into her next phase. Sleep well, sunshine!
Sources/Details:
Pattern: Based on the NightSky Quilt, with custom adjustments to make it a twin
Finished size: Twin- Roughly 72" x 90"
Total Time spent: 22 hours
Cost: Maybe it's a little tacky to talk about this (it was a gift after all) but I think it's interesting to know what goes into projects like this, so I'll share. I didn't keep track super accurately, but all in, it's roughly $120. (For reference, the baby quilts were approx $65 for both, which I attribute to a combination of less expensive fabric, better coupons/deals, smaller size, and more effeciency with making two of the same thing).
Fabric: JoAnn's brand solids & Kona Cotton solids (some purchased at Quilt Beginnings) Backing fabric: Quilter's Showcase: Oasis Modern Geo
Custom name tags: Mission Market Co. I ran out of the first batch she made, so she whipped up a new design for my next round (here's the listing for the tags...but I dare you to browse her shop and NOT find something you NEED.)
Binding: Cluck Cluck Sew machine binding tutorial, using three 3yd packs of double fold bias tape.
Batting: Pellon Nature's Touch Cotton Batting Twin Size 72"x90"
P.S. See more quilty goodness: here on the blog, or on IG via #bowdenismsews


No comments :
Post a Comment